Showing posts with label Entree. Show all posts

Thursday, 7 November 2013

Cast-Iron Skillet Cooking {Pear & Roasted Garlic Riesling Pork Chops for Two}


This past weekend, I had a great time with a close friend, heading just out of the city to Almonte for a little antique shop perusing and to check out the Handmade Harvest Craft Show. We were not disappointed with the array of awesome handmade crafts at the show - so much great local talents! And there were also some great antique finds! We even popped into the Tin Barn Market, Hello Yellow and Superior Diner for some good old fashioned, diner poutine and a pop to fuel up!

On the way back to Ottawa, we stopped in at my friend's beautiful parent's house for a moment! We were greeted a warmly by her family doing some kitchen floor renovations. We sat for a minute and talked with her mom about our day and antiques and dessert recipes. I mentioned I had been looking for a new cast-iron pan. On our way out of the house, her mom handed me a cast-iron pan and a loaf of raisin bread (probably the best raisin bread I have ever had! It was seriously amazing!). I promised her mom that the next recipe on the blog, I would use the cast-iron skillet. So, without further ado...

Pear & Roasted Garlic Riesling Pork Chops for Two


Ingredients:

2 large, thick pork chops (ensure that there is fat on the chops, around the edge for maximum carmelization and deliciousness)
3 cloves garlic, halved
1 medium pear, sliced
1 shallot, quartered
1 teaspoon dried savoury
1/3 cup riesling (I used Cave Spring 2011 Riesling)
Freshly cracked black pepper & sea salt
Extra virgin olive oil
Cast-iron skillet

Method:

Preheat the oven to 375°F.

In a shallow baking dish season the pork chops well with salt and pepper, savoury and about half of the riesling.

Heat the cast iron skillet on the stove with extra virgin olive oil, just until you see a fee strands of smoke come up from the pan. You want the skillet to be very hot to sear the outside of the meat. Add the pork chops to the pan. Sear until golden brown and delicious crust forms on each side. Add the 1/3 cup of riesling.

Take the pan off the heat, arrange the garlic, pear, shallot in the pan with the chops. Place in the oven for 10 to 15 minutes, until the pears, garlic and shallot become caramelized.

Serve the prok chops in the pan as they are at the table. This is the perfect Sunday dish for two. Remember to buy some nice crusty bread to soak up all the yummy pork juices!

Enjoy!

-Tina (Turnip)


Wednesday, 18 September 2013

Finally, fall! {Warm & Cozy Vegetarian Samosa Stuffed Peppers}

Although Alex and I love the summer months - the hot, sunny weather, the blue skies, the lazy, popsicle filled days - we spent much of the month of August dreaming of fall.

The dreams of cool mornings, knitted scarves, warm sweaters, riding boots, warm spiced lattés, and cozy comfort foods that filled our heads, are finally coming true these past few days. The leaves are turning a burnt orange, a vibrant red or a golden yellow. Walking to work in the morning you can see your breathe in the crisp air and feel the crunch of leaves under your feet. You have those warm, fuzzy thoughts of cuddling up with someone special under a blanket.

Finally, fall!

To celebrate the start of this time of year, I was very excited to do some comfort cooking. My recipes are often cooked up, due to necessity or what is in my fridge or pantry at the time.This recipe is no exception. I was inspired by Indian spices that just seem to scream fall, with their warmth and intense colours and flavours.

This recipe is vegetarian and is relatively easy, and will definitely warm you up on those cool fall evenings.

Vegetarian Samosa Stuffed Peppers


*This recipe makes 6 portions (or three peppers, halved)

Filling:

4 medium potatoes, boiled and diced
1/2 cup red pepper, finely diced
1 large onion, finely diced
2 cloves garlic, minced
1 1/2 cup frozen or fresh green peas
2 tablespoons madras curry powder (fresh ground if possible)
1 tablespoon paprika
1 tablespoon cumin
1 teaspoon ground fennel
1/2 cup water
1 cup homemade tomato sauce or crushed tomatoes
Salt and pepper to taste

Peppers:

3 medium sized peppers
1 1/2 cups homemade tomato sauce or crushed tomatoes
1 tablespoon madras curry power
Halloumi or mozzarella cheese (optional)

Method:

In a large skillet, heat a tablespoon of olive oil and add the finely diced onion. Cook the onion until there is some caramel and golden colour. Add in the finely diced red pepper and cook until soft. Add in the garlic and the madras curry powder, paprika, cumin and fennel. Toast the spices in the pan for a minute or so - the smell of spices should waft through the air. Add in the cooked potatoes and peas and mix well with the onion, pepper, spice mixture. Add the water and tomato sauce, and salt and pepper to your taste. Cook, covered over a low heat for about 10 minutes, stirring occasionally, mashing the potatoes and peas together slightly, until it becomes a coherent mixture.

Preheat your oven to 375°C. Halve and clean the three medium peppers and set aside. I used green and red peppers for this recipe, I can't decide which I like better as both were delicious, but use your preferred colour of pepper. Mix the tomato sauce and madras curry powder in a bowl and set aside as well.  Prepare a deep dish baking pan, by lining it with tin foil (for easy clean up). Grate the cheese and set aside (optional).

To assemble the stuffed peppers, inside each of the pepper halves, add a tablespoon or so of the spiced tomato sauce. Scoop a heaping spoon of the potato and pea (samosa filling) mixture into each of the stuffed peppers. In the baking dish, place a thin layer of tomato sauce. Place each of the filled stuffed peppers into the tray. Top the peppers with the remaining tomato sauce. Then top the stuffed peppers with cheese of your choice. Salty halloumi or mozzarella is best; this is an optional addition.

Bake in the over for 1 hour, or until the peppers are soft and the warm spicy smell envelops your kitchen. These can be eaten straight out of the oven or you can let them cool and pack them in airtight containers for weeknight dinners. They can also be put in the freezer and reheated at a later date.


Welcome fall into your kitchen with this warm and cozy recipe!

Enjoy!

-Turnip (Tina)

Friday, 28 June 2013

Summer BBQ Alternative: Black Bean Burgers


This Canada Day weekend will be a great opportunity to get together with friends and family to celebrate this great country, and of course, share some great food! Now that the hot and humid weather has arrived, many shy away from using the stove or oven and in it's place, fire up the ol' BBQ. Despite the fact I am unable to keep one at my apartment, I still take advantage of the season by frequenting my parents house for all of my favourite summer staples.

The recipe I am about to share with you is a great alternative to your everyday beef burger. In fact, I think it tastes even better than most beef burgers. Now, you may be rolling your eyes at that comment - but seriously, just try these! They pair perfectly with a few slices of avocado, some pico de gallo, and a dollop of spicy sriracha mayo. 

These burgers are vegetarian, however, they can very easily be altered to accommodate a vegan diet as well. They are super easy and incredibly fast to whip up and do not require any equipment beyond a fork and a knife for their assembly. I have made them both vegetarian (with an egg used as a binder) and vegan (with vital wheat gluten as the binder). I personally prefer the egg version as I find them slightly more moist, and the vital wheat gluten can make them a little chewy, but they are definitely both very tasty. These are probably easiest to pan fry as they can be a little crumbly, but they would probably do quite well on the bbq if you placed them in a foil pan. If you are extra gentle you may be able to get away with putting them directly on the grill. 

Black Bean Burgers
Adapted from the Veganomicon recipe
Makes 4 - 6 patties


Ingredients

1 can (540 mL) black beans, drained and rised
1 egg (or 1/2 cup vital wheat gluten for vegan)
1/2 cup italian bread crumbs
1 tbsp chile powder
1 tsp cumin
1/4 cup water
1 tbsp tomato paste
1/4 - 1/2 cup fresh cilantro, finely chopped (I went a little crazy the second time I made these - too much cilantro will make your burgers crumbly - be careful!)
2 cloves garlic
1/2 small onion, grated or finely diced
2 tbsp cooking oil (vegetable, coconut, or olive)

Directions

After beans are drained and rinsed, roughly mash with a fork (I ended up using a potato masher, but a food processor would work too). Do not mash too finely; you want a good number of partial bean pieces left in the mix.

Add the remaining ingredients (except the olive oil) and mash everything together, using your hands. Shape mixture into patties, about 1 inch thick. The bigger the patty, the more likely it will fall apart when you're trying to flip it. I was able to make four patties which were about the size of your average burger. They could also be made much smaller for cute bean burger sliders! 

If you are going to pan fry, heat up 2 tbsp or your preferred cooking oil and cook burgers for approximately five minutes on each side. I suggest placing the burgers in a foil pan if you are going to use the BBQ to cook, as they may crumble on the grill.

Place on a burger bun or lettuce wrap, add your favourite toppings and enjoy!


Hope you all have a fun, safe, and BBQ-filled Canada Day!

- Bean (Alex)

Monday, 3 June 2013

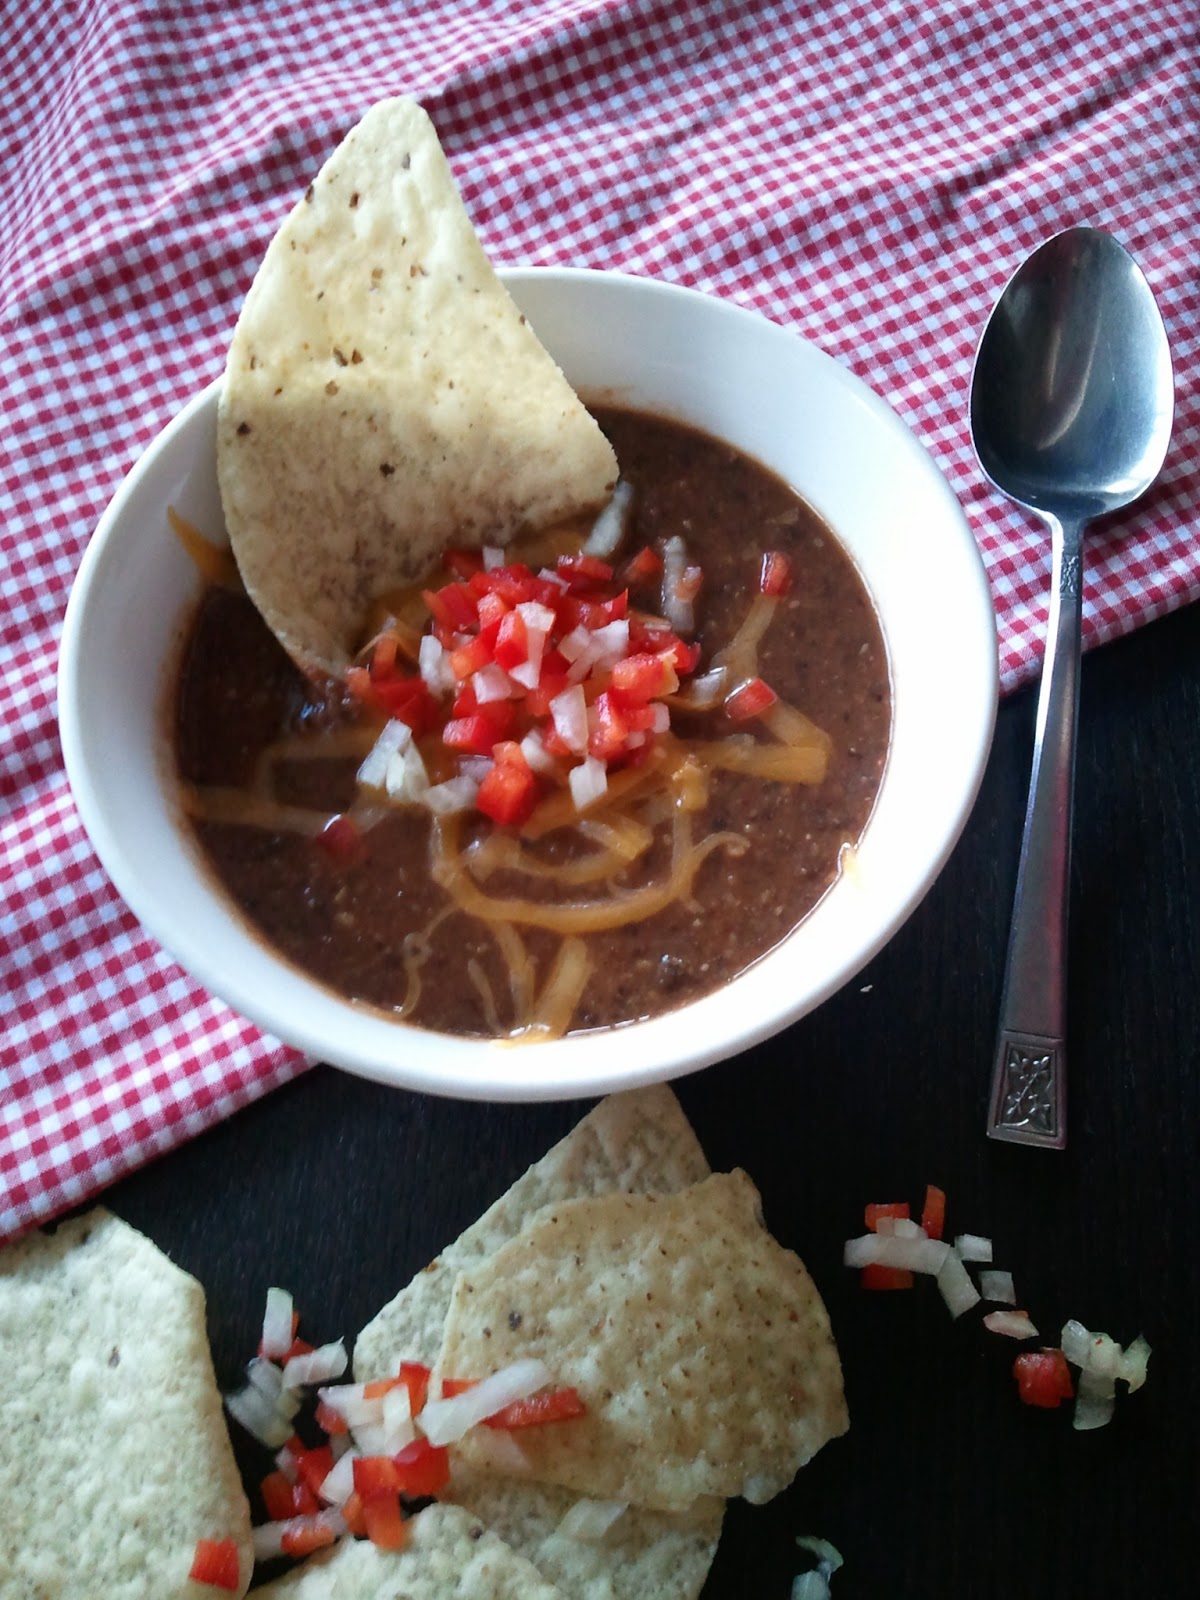
Spicy Black Bean Pale Ale Soup

Generally, I don't make any fussy weeknight dinners. But that doesn't mean I don't want something flavourful.  Soup is a great dinner and can be made in advance, like on a slow weekend and kept for dinners (and lunches) throughout the week.

This is a great recipe to be made ahead and served during the week. It's also wonderful for those long tiresome Mondays, because it includes one of my favourite ingredients: beer!

Spicy Black Bean Pale Ale Soup


Ingredients

1 1/2 cups dried black beans (soaked overnight or for 10 hours in 4 cups of water)
1 355 ml can of Pale Ale (I used Red Racer brewed in Surrey, BC)
2 vine ripened tomatoes
4 cloves of garlic
1/2 large onion, chopped
1/2 red pepper, chopped
1/2 cup button mushrooms, chopped
5 cups water
1 tablespoon paprika
1 teaspoon Adoba seasoning (can be substituted for salt and pepper)
1/2 teaspoon fennel
1 tablespoon cumin
1/4 teaspoon cayenne pepper
Hot sauce to taste (I used the amazing Cool Canadian hot sauce from Chamomile Desjardins, bought at the Ottawa Farmer's Market)
Squeeze of lemon
Salt and pepper to taste
An embarrassing amount of sharp cheddar cheese
Tortilla chips

To start this recipe, measure  the dried black beans into a large glass bowl and cover with 4 cups of water. Let soak overnight or for 10 hours. Once the beans have soaked overnight, they can be cooked in a large pot of 4 cups of water and a pinch of salt. Bring the beans to a boil, let simmer for 1 hour and 15 minutes. By this time, there will still be some liquid left over in the pot. Turn the beans off and set aside (do not drain).

In a food processor or blender, blend the tomatoes and garlic until smooth. Heat a large skillet with 1 tablespoon of olive oil. Add the chopped onion, red pepper and mushrooms; cook until softened (about five minutes). Add all of the spices and seasoning and let the spices toast in the pan for about one minute. Add the blended tomato and garlic mixture; let simmer for 3 minutes. Add the beans that were set aside, the beer, the hot sauce, and the final cup of water; mix together well. Bring the mixture to a simmer and turn down to a medium low heat; cook for 35 minutes, stirring occasionally. 


After the 35 minutes, the beans should be tender. Use a hand blender and blend the soup smooth. Add a squeeze of lemon and salt and pepper to taste. Serve in a large bowl with (as the recipe states) an embarrassingly large amount of sharp cheddar cheese and tortillas chips. The soup would also be great with guacamole or plain yogurt dolloped on top. 


This soup is very healthy, packed with protein and quite easy to make. Spice up your weeknight dinners and give it a try!

Enjoy!

-Tina (Turnip)

Tuesday, 23 April 2013

Arugula & Hazelnut Pesto Pasta with Feta Cheese

Simplicity can be underrated. In the overly complicated world we live in, when things that seem to make no sense occur, when your mind is overflowing with thoughts and ideas, it is often very simple things that we turn to, to make us happy. Simple acts of kindness, simple gestures of love, simple pleasures.

---

Our neighborhood does not have a big grocery store close by, so when we are lacking an ingredient or if we get snacky, we turn to our local corner store - Abbas. Co-owners Mike and Rod Abbas are wonderful people. It's one of those old style mom and pop places where you walk in and they welcome you with a friendly smile and conversation. Abbas is great because they have a wide selection of pantry goods; the typical pop, chips and candy bars, but also produce and  homemade sandwiches, soups and stews. I swear I am in the store every other day (at least!).

Last week I had unexpectedly run out of milk, so I stopped by Abbas to pick up a carton. While I was waiting in line to pay, the man in front of me, very obviously down on his luck, stepped slowly up to the counter with a handful of change and carefully put it down. There were a few dimes, a bunch of quarters and a couple of nickels in the pile. Without saying a word, Mike reached under the counter for a large cardboard box and began filling it with prepared sandwiches. He paused for a moment, look up at the gentleman, gesturing to a bunch of bananas. The man nodded and Mike added that to the heaping pile of sandwiches. He set the box on the counter swept the pile of change into his hand, which must have only added up to a dollar or two and carefully reminded the gentleman that he must eat those sandwiches up by the end of the next day. The gentleman smiled slightly and was on his way. Although, I was not surprised by this generosity, I was amazed by the almost mute interaction that I had just witnessed. Nothing needed to be said. I was comforted by the fact that there are still those who understand and realize that  good can be spread with simple acts - like allowing a man to eat and feel the dignity that he paid at least something for it.

---


After a long, stressful day at work on Monday, I was dead in the water. My brain just stopped working. While many people would turn to a take-out menu, when I am feeling rundown, I turn to my kitchen. Its the place where things become uncomplicated for me. I can think and focus on chopping, mixing or blending and the world outside, for a brief moment, seems to fade away. I wanted a big bowl of pasta; simple, comfort food. I set out all my ingredients and began to cook. The window was open for a soft breeze, the dog was running around, playing at my feet. I sighed and felt immediately better.

Whether a smile, a laugh, a hug, a box full of sandwiches or a giant bowl of pasta, we need not forget the little, easy, simple things in life that, for whatever reason, make the world a happier place.

Arugula & Hazelnut Pesto Pasta with Feta Cheese


 2 cups of organic baby arugula
1 cup of organic hazelnuts or filberts, plus a few for on top
3 cloves garlic
1/2 cup extra virgin olive oil
1/4 cups grated parmesan
1/4 cup lemon juice
Salt & Pepper to taste
Feta cheese to crumble on top
3 cups of dry pasta of your choice

Start a large pot filled with water and a table spoon of salt over high heat to boil. When cooking pasta it is a very good idea to season the water liberally. Once the water has come to a rolling boil, add in your dry pasta. I used casarecce pasta because it has nooks and crannies for the pesto to get into. Cook pasta until al dente (to the tooth) or until it still has a slight bite to it.

Add the arugula, hazelnuts, garlic, olive oil, parmesan, lemon juice and salt and pepper in a food processor or blender. Blend until the mixture has a sauce-like consistency. I used a blender to make my pesto and it required a bit extra lubrication, so I added a bit of water to the sauce to loosen it up.

Once the pasta is cooked, strain, reserving a half cup of the cooking liquid. Add in all of the pesto to the pasta and coat well. If it seems too thick, add some of the reserve pasta water to loosen it up.


Serve the pasta family style, in a large bowl, with lots of crumbled feta cheese and some extra chopped hazelnuts on top.

*Note: This pasta is great left over the next day for lunch too! Maybe even better than fresh!

Enjoy!

-Tina (Turnip)

Tuesday, 9 April 2013

Indian Spiced Scrambled Egg Naan Wrap

You know those days when you get the biggest craving for a particular type of food? Today was most definitely one of those days. The ingredients for a mushroom and pea curry have been biding their time in my refrigerator and cupboards for the past week or so, just waiting for me to muster up the effort to combine them (am I the only lazy cook around here?). I was really craving something warm and spicy while at work today and I knew my kitchen was clean and ready to go, so I thought, sure, it would be the perfect night to make some curry!

I like to think I keep a fairly decent mental map of my kitchen in my head and I was absolutely sure that I had some raw cashews in the cupboard. I didn't even think to pick up any extra at the grocery store on the way home. To my dismay, as I began to assemble my ingredients I noted a very clear lack of cashews. Now, sometimes I'll just fly by the seat of my pants and alter the recipe to work with the ingredients that I have on hand, but tonight was an exception. I decided that if there were no cashews, there would be no curry! Perhaps this is just my inner lazy cook looking for an excuse...

I scrambled (hah!) to think of a something else I could make using the multitude of Indian spices I now had on my counter. I had a few eggs in the fridge that were getting close to the expiry date and in dire need of being used up. This lead me to the idea of an Indian spiced egg dish of sorts. Originally I had been hoping to concoct some sort of omelette but this ended up being scrambled eggs (and that's the beauty of cooking eggs - even if you mess up it still turns out delicious!).

This dish turned out pretty tasty but I would definitely change a few things when I make it again in the future. I believe I added a little too much spice (it ended up slightly bitter), and I would also add some cheese in the form of paneer. This recipe is a good starting point for a multitude of add-ons.

I ended up eating the scrambled eggs curled up in a naan taco of sorts (but naan wrap sounds a little better than naan taco to me... but, come to think of it taco naan would be quite delicious). Plenty of grocery stores carry fresh or frozen naan that's easy to heat up in the oven.

Indian Spiced Scrambled Egg Naan Wrap


Ingredients

1 tbsp vegetable oil
1/2 small yellow onion, diced
1/2 green chile pepper, diced
2 cloves garlic, crushed
1/2 small onion, diced
1/2 tsp ginger root, grated
1/4 tsp turmeric
1 tsp fenugreek powder
1 tsp ground cumin
3 eggs
1 slice naan bread, warmed

Directions

Remember to preheat your oven for the naan bread (I set my oven for 375 and placed the bread in right away before I began to cook. As the oven preheated it warmed the bread and it was ready by the time I was finished!).

Heat the oil in a frying pan over medium and fry the onion, green chile, garlic and ginger until the onion is translucent

Add the turmeric and cook for approximately 1 minute

Add the fenugreek and cumin (I suggest reducing each to 1/2 tsp at first as I found a full tsp of each to be a little too strong) and continue to cook for a few minutes

Beat the eggs lightly and add salt and pepper to taste. Add the eggs to the frying pan and continually stir and push the cooked edges to the centre until cooked (take them off the heat while they are still slightly runny/shiny - you don't want them to overcook!).

Place the cooked egg mixture on top of your naan bread (or tortilla, if you prefer), wrap up, and enjoy! I found a nice crisp and slightly sweet apple paired with this meal wonderfully.

Note: If you want some extra veggies in your scrambled eggs I highly suggest mushrooms, spinach, shredded carrot or tomatoes!

- Alex (Bean)

Saturday, 6 April 2013

Warm Brussels Sprout & Soft Boiled Egg Salad

Apartment cleaning was complete, errands were run, dog grooming was finished. Finally, a chance to sit and enjoy a gorgeous spring Saturday. There isn't much to this dish, but it is simple and satisfying and works great as a weekend brunch dish.

Warm Brussels Sprout & Soft Boiled Egg Salad


1 soft boiled egg*
1 tablespoon extra virgin olive oil
2 cups of Brussels sprouts, cut into eighths
1 teaspoon dijon mustard
4 tablespoons apple cider vinegar
1 teaspoon sugar or honey
Salt & Pepper
Parmesan cheese (optional)

First prepare your Brussels sprouts by cutting off the ends of them and remove the first few outer leaves. Wash the sprouts well in cold water. Cut the sprouts into eighths.

Heat a medium sized frying pan and add in the extra virgin olive oil. Once the pan is hot, add the Brussels sprouts. Add in a quarter cup of water and cover the pan. Let the Brussels sprouts cook until tend and slightly caramelized on the outside. Add the salt and pepper to taste.

While the Brussels sprouts are cooking, mix the dressing together: dijon mustard, apple cider vinegar, and the sugar. Add the dressing to the pan with the warm Brussel sprouts and toss together. Top with a sliced soft boiled egg, salt and pepper and if you are feeling a bit decadent, some parmesan cheese.


*To prepare a soft boiled egg, add your eggs into a medium sized sauce pan and fill with water until the eggs are just covered. Heat on the stove until the water boils. Once the water has boiled allow the eggs to cook for 3.5 minutes. Once the time is up, turn off the heat and let the eggs sit in the water for another 1.5 minutes.  Then rinse the eggs under cold water until they are cool to touch. Peel the eggs and slice!

Enjoy!

-Tina (Turnip)

Sunday, 24 March 2013

Ottawa Good Food Box and New Recipe: Lettuce Wrap Peanut Chicken & Spicy Broccoli

I picked up my very first Ottawa Good Food Box this past Wednesday, and I am very happy with the result. Definitely a great way to welcome the first day of Spring! If you're curious as to what the Ottawa Good Food Box is, they describe themselves as "a non-profit community-based initiative bringing neighbours together to buy a variety of delicious and nutritious fresh fruits and vegetables at wholesale prices." I first found out about this initiative when researching local food co-operatives and I thought it would be worth a try. I have been striving to add more fruits and vegetables to my diet and I have also been trying to purchase locally grown items where I can (I've been finding this is a little more difficult during the winter months). The Ottawa Good Food Box states that they "strive to source contents as locally as possible, balancing that with the goal of good value for customers." I ended up ordering the medium sized box for $15.00, however, they also offer small and large boxes, fruit bags, and an organic produce box. If you would like to check them out, you can access their website here

I received the following items:

6 Apples, Sweet Potato, 2 lb carrots, 5 bananas, 2 bok choy, mango, head of lettuce, 3 oranges, small bag of mushrooms, broccoli, and 2 lb bag of yellow onions

All in all I would say this is a great way to supplement your fruit and veggie intake. I found the value and quality of the produce to be better than what I have been buying at the grocery store this time of year (even the fiancé agreed - he remarked how fresh and green the broccoli was as we ate it!). It was also very easy to order (they offer online ordering and payment for select pick-up locations around Ottawa). My only complaint is that the pick-up hours at the location I chose were 10am - 4pm, which interferes with the hours I work. Not too much of a problem though - if I order again I will just choose a location closer to my workplace! 

Here is a simple recipe utilizing the lettuce and broccoli I received in the box:

Chicken Lettuce Wraps with Peanut Sauce and Spicy Broccoli

Ingredients

For the Chicken Wraps

2 boneless skinless chicken breasts
3 1/2 tbs soy sauce
1/2 tbs sesame oil
1 tbs vegetable oil
5 lettuce leaves

Place chicken breasts in resealable container or bag with soy sauce and sesame oil. Marinate in the refrigerator for at least 3 hours (I did this in the morning before leaving for work, and cooked the chicken when I returned home).

Once chicken has marinated, remove from container (shake off excess marinade) and cook in sauté pan with 1 tbs vegetable oil on medium heat. Cook each side approximately 3 - 5 minutes, or until no pinkness remains. Place chicken on lettuce leaf, pour over peanut sauce (below), wrap up and enjoy!

For the Peanut Sauce (I used this Martha Stewart recipe)

3 tbs smooth peanut butter
2 tbs fresh lime juice (~1 lime, juiced)
1 tbs Asian style chili-garlic sauce
1 tbs brown sugar (I used dark)

Combine ingredients and in small sauce pan on low heat. Stir regularly until heated. Spoon over chicken.

For the Spicy Broccoli 

2.5 tbs soy sauce
1/2 tbs sesame oil
2 garlic cloves, chopped
1/2 tsp chili flakes
2 broccoli crowns, separated into bite size pieces

Combine first four ingredients and set aside. Steam broccoli until desired tenderness is reached (usually 5 - 10 minutes). Pour sauce on top and enjoy!


This ended up being a surprisingly quick and delicious weeknight meal using ingredients I already had around the apartment. Our "wraps" were more like tacos, as it was difficult to wrap the lettuce up around the chicken. I wouldn't change a thing though!

I'm looking forward to sharing some more recipes using the ingredients of my Good Food Box over the next week! Stay tuned!

-Alex (Bean)

Quattro Stagioni (Four Season) Pizza

For me, the weather outside often determines what I want to eat. Cold, snowy weather? I want a hearty stew. Hot and humid? I want  barbecue and a cold beer. This week, it officially became spring. Mother nature of course, I think, did not get that memo (at least here in Ottawa) as we received yet another dump of the white stuff. In the last month, we've had warm weather, brutally cold weather; we've had all the snow melt completely, only to return, covering the ground anew, a few days later. I was speaking with one of my co-workers and she commented on how Ottawa, around this time, seems to experiencing all four seasons in a few weeks time. It's very true, but that comment also inspired me!

'Quattro Stagioni' in Italian means 'four seasons'. The traditional quattro stagioni pizza consists of four sections of toppings: artichokes, tomato sauce, mozzarella and ham and olives. But inspired by our 'four-season-spring' I decided I wanted to create a pizza with four sections of spring inspired toppings. Although, it isn't traditional, the combinations I came up with are absolutely delicious.

I am notoriously bad with doughs and so, I have made it my mission to correct this. I searched around for a dough that seemed easy to make. I found that The Kitchn had a really great article entitled "How to Make Really Good Pizza at Home" and decided to follow that. The recipe is straightforward, simple and relatively quick. If you follow the instructions, you will be sure to have an excellent pizza dough.


One great thing about pizza is that the combinations of what you can put on top of the crust are endless. The four flavours I cam up with are fresh and spring inspired and each of them would be good on their own pizza., but are great all together. For those recipes, see below, but I encourage everyone to be a bit creative and come up with their own unique toppings!

Quattro Stagioni (Four Seasons) Pizza


Thin Crust Pizza Dough 


*Tips for the best pizza dough:
-Ensure that your yeast is fresh
-Give yourself time when cooking to let the dough rest and rise
-Add about 3/4 of the flour that the recipe calls for at first. This will ensure that your dough does not become too dry. If it is still too sticky to handle, add the rest of the flour. 
-The recipe called for a 500°F oven. My oven runs hot, so I bake my pizzas at 475°F for ten minutes. They came our golden and crisp.

Topping no.1: Basil & Sweet Pea Pesto with Sovrano Cheese


1 cup fresh or frozen sweet green peas
1 bunch of fresh basil
1 clove garlic
1/2 cup extra virgin olive oil
Salt & Pepper
Sovrano Cheese (or Parmesano Reggiano)

This recipe can be done in the food processor or can be hand-chopped. I prefer the hand-chopped method, giving the pesto a more rustic feel. Finely chop the basil and run your knife through the sweet green peas, breaking them up. Add to a bowl with one clove of garlic, finely mined, olive oil and salt and pepper. Mix together. When  you are ready to assemble the pizza, spread the pesto on the dough and top it with your cheese of choice. I used Sovrano which is sharp and salty, contrasting the sweet pea and basil mixture. 

*Although it was very hard to choose, I think that this topping was my favourite of them all!

Topping no.2: Fresh tomato sauce with Basil & Mozzarella

1 large tomato, chopped
1 clove garlic
2 basil leaves chopped
2 tablespoons extra virgin olive oil
1 teaspoon sugar (or honey)
Salt & Pepper
Torn Basil leaves
Mozzarella cheese, grated

Add the chopped tomato, garlic, basil, olive oil, sugar and salt and pepper to a medium saucepan. Bring the mixture to a simmer, then turn the heat down to medium-low and let simmer until the sauce thickens slightly and is not too runny. When you are ready to assemble the pizza, spread the sauce on the dough and place the basil leaves and mozzarella on top. Simple and classic pizza topping!

Topping no.3: Wine Braised Leeks and Fresh Asparagus with Sovrano Cheese


1 leek, sliced
1/2 cup white wine
1 cup water
2 tablespoons butter
2 tablespoons extra virgin olive oil
Salt & Pepper
4-5 asparagus stalks, sliced thinly
Sovrano Cheese (or Parmesano Reggiano)

Take the outside leaves off from the leek. Slice the leek down the centre (longways), then chop each half into smaller pieces. Fill a large bowl with cool water and add the sliced leeks into the bowl and move them around, then let them sit in the water for about 10 minutes. Because of the way leeks grow, dirt and grit can get caught within. This method will allow the grit to come off of the leeks and settle to the bottom of the bowl. 

Heat a medium sized skillet and add the butter and olive oil. Gently take the leeks from the water and add them directly into the pan. Add the wine and water, and cover to let cook over medium heat for about 15 minutes, stirring occasionally. The leek mixture, when ready should be soft and almost spreadable. When ready to assemble the pizza, spread the leek mixture on the dough, top with the very thinly sliced asparagus and the cheese. 

*This topping was a close second to the basil and pea pesto - almost too close to call!

Topping no.4: Canadian Style Oyster Mushroom & Bacon pizza

4 oyster mushrooms, clean and sliced
4 rashers of bacon, cooked until crispy and crumbled
Fresh Tomato Sauce (see above)
Wine Braised Leeks (see above)
Mozzarella Cheese

When ready to assemble your pizza, top the dough with the tomato sauce, and some of the leeks. Top with the bacon, fresh oyster mushrooms and Mozzarella cheese. This was my take on the classic Canadian style pizza, we all know and love! 


Enjoy!

-Tina (Turnip)


Sunday, 17 March 2013

Braised Beef & Roasted Root Vegetable Irish Stew ft. Wellington Brewery Dark Ale

Being Irish (my last name is McMahon...C'mon!) my family celebrates St. Patrick's Day, like any holiday, with good food and uses it an an excuse to drink slightly in excess. In my expert opinion, the holiday is not the same without a hearty Irish stew. It's been tradition for the past few years that I make up a stew to share with family and friends, enjoyed with a cold beer. This year was, of course, no exception!

So, call up your friends and family, tell them to come over and bring some beer, and cook up this awesome St. Patty's Day classic.

Braised Beef & Roasted Root Vegetable Irish Stew ft. Wellington Brewery Dark Ale


3 lbs stewing beef, cubed
2 lbs baby red skin potatoes, whole
3 parsnips, sliced into 1 inch pieces
3 carrots, sliced into 1 inch pieces
1 leek, sliced
1 large onion
1 bunch of kale
1 cup of frozen peas
10 cloves of garlic
4 cups No Salt Added Beef Stock 
2 tall cans Wellington Brewery Dark Ale (or a dark beer)
Salt and pepper
4 tablespoons butter
1 tablespoon Dijon mustard
Extra virgin olive oil
Fresh parsely (optional)
Dash cayenne pepper (optional)

Preheat your oven to 325°F. Season the beef generously with salt and pepper. In a roasting pan, add the seasoned beef, one onion quartered, five cloves of garlic, one of the cans of beer and approximately one cup of the beef stock. Place lid firmly on roasting pan and place in the oven. Cook at the low temperature for 3 hours. 

Meanwhile, prepare all of the vegetables: the red skin potatoes, parsnips, carrots and leeks. Place the vegetables on a baking pan, season with salt and pepper and coat with olive oil. Once the beef has been in the oven for 3 hours, increase the temperature to 400°C. With the beef in the oven still, place the baking sheet of vegetables in the oven as well. Bake for 30 minutes, or until the vegetables are tender and slightly caramelized. 

Remove the beef and the vegetables from the oven. Place the vegetables in a large stew of stock pot and remove the beef from the liquid in the roasting pan; reserve the cooking liquid and onions from the bottom of the pan. 

In a blender, place the reserved cooking liquid with garlic and onions, add the rest of the stock and blend until smooth. Add it to the stock pot with the vegetables, beef and also add the other beer. Mix in the Dijon mustard and a pinch of cayenne pepper. On a medium heat, bring the stew up to a boil and add in the chopped kale and frozen peas. Turn down the heat to very low temperature and let simmer for 20 minutes, stirring often. Taste the stew and season to your liking with salt and pepper. Once you are ready to serve add in the 4 tablespoons of butter. 

Serve with some fresh chopped parsley on top and with Irish soda bread, biscuits or rolls on the side. And don't forget to enjoy this stew with your favorite cold beer!


Happy St. Patrick's Day! Cheers!

-Tina (Turnip)

Source: Wellington Brewery - http://www.wellingtonbrewery.ca/

Monday, 25 February 2013

Curried Sweet Pepper Soup

Sometimes after a long day at work the last thing I want to do is cook. Today was no exception - I wanted something that was healthy, fairly quick and simple, and I only wanted to use ingredients that I already had in my apartment.

I was out of town on a business trip last week and I had left behind some mini sweet peppers in my fridge. They were starting to look a little wrinkly upon my return and I figured they would work best in a soup. This soup turned out quite tasty! It has a slight curry flavour and a bit of creaminess from the greek yogurt I used. It definitely hit the spot after a long day at work and I have plenty left over to bring for lunch tomorrow. If you would like to make this soup a little more substantial, I feel as though some rice or shredded chicken would make a nice addition.


Curried Sweet Pepper Soup

1 tbsp salted butter
1/2 large spanish onion, diced
4 cups various sweet peppers, chopped (I used red, orange, and yellow mini peppers)
4 cups low sodium chicken broth
1 tsp paprika
1 tbsp curry powder
approx. 2 cups canned diced tomatoes (or one 14.5 oz. can)
1 cup plain greek yogurt


In a large saucepan or dutch oven, melt 1 tbsp of butter on medium heat. Add the diced onion and cook for approximately 5 minutes, or until translucent.

Add the chopped peppers, cover the pot and cook for 15 - 20 minutes or until soft, stirring occasionally. Add more butter if your peppers or onion start to burn.

Add the chicken broth, diced tomatoes, paprika, and curry powder and bring to a boil. Reduce heat and allow to simmer for 30 minutes, stirring occasionally. I kept the lid on the pot for this portion as well.

Use an immersion blender to blend the soup. Add the plain greek yogurt (you can blend this in as well, or just put a dollop on top).

Serve and Enjoy!

- Alex (Bean)

Friday, 4 January 2013

Chinatown Adventure: Kowloon Market and Spicy Peanut Quinoa Salad with Dark Soy Marinated Tofu

Chinatown Adventure: Kowloon Market

For the first blog post, I thought I would write about a Chinatown food adventure that Alex and I shared and some recipes that I created with inspiration from the shopping trip! 

After a week of temperatures hovering around -38 Celsius with the windchill, this Saturday it finally warmed up to -18 C! Comparatively, it felt like spring outside! Well, okay, that is a bit of an exaggeration, but it was at least bearable to walk outside for more than five minutes. We decided it would be a great day to get lunch in Chinatown and then head over to Kowloon Market on Somerset. With our guys in tow, we bundled up and headed out to grab some steaming hot pho at Pho Bo Ga 2. A big bowl of soup hit the spot and warmed our bellies enough to head back out into the cold and up the street to the grocery store.

Kowloon Market is a wonderful place which seems to transport you away from Ottawa as soon as you walk in the door. Not only do they have some great and varied produce, they also have a selection of unusual ingredients, a fresh meat and fish section as well as a bakery. This visit to the store was especially fun as they had a whole host of Chinese New Year delicacies.  We picked up some fresh wheat noodles, frozen dumplings and bbq pork steam buns, sesame cookies and peanut crisps (little peanut brittle-like candies), hoisin sauce, red chilies and a new ingredient I have never used before, dark soy sauce. All of these ingredients contributed to a fantastic feast which was had later on that day.  

Whenever I go to Kowloon market I always get inspired. Even a day later, I was inspired by the smells and flavours. Since, on Sundays I often make lunches for my week ahead, I decided I would make an asian inspired dish. I was most intrigued by the dark soy sauce I bought and I used that as my jumping off point. Dark soy sauce has been fermented for a longer period of time. It is thicker than traditional soy sauce, saltier tasting and also has a hint of molasses flavouring, making it very rich - only to be used sparingly. Here is what I came up with: Spicy Peanut Quinoa Salad with Dark Soy Marinated Tofu. I cannot wait to have lunch this week!

Spicy Peanut Quinoa Salad with Dark Soy Marinated Tofu


Dark Soy Marinated Tofu

2 tablespoons dark soy sauce
2 tablespoons fresh lime juice
1/4 teaspoon black pepper
1 cup cubed tofu

Salad

3 cups cooked Quinoa
1 cup fresh or frozen peas
1/4 cup diced cucumber
1/4 cup diced green or red pepper
1/4 cup diced carrot
1 small red chili, sliced very thin
2 tablespoons toasted sesame seeds
2 green onions sliced diagonally
cilantro (to taste)

Dressing

1 tablespoon dark soy sauce
2 tablespoons fresh lime juice
1 tablespoon rice vinegar
1 tablespoon peanut butter
1 tablespoon water
4 tablespoons extra virgin olive oil
1 teaspoon minced or grated garlic
1 teaspoon minced or grated ginger

Add to the cubed tofu, lime juice, black pepper and dark soy sauce in a bowl. Let sit for 15 to 30 minutes. After marinating, heat a small non-stick frying pan and add the tofu. Brown the tofu in the pan under just brown and crispy on the edges. Remove the tofu and while the pan is hot add the sesame seeds to toast them. Allow them to get golden brown, taking approximately 5 minutes. 

While you are waiting for the tofu to marinate, you can get the quinoa and vegetables going for the salad. Cook quinoa according to the packing (type I had called for 15  minutes of cooking time). Once the quinoa is cooking, you can go ahead and begin chopping the cucumber, pepper, carrots, red chili, and green onions. If you are using frozen peas, the last minute of cooking the quinoa add the peas so they defrost. Allow the quinoa and peas to cool slightly before mixing the salad. Once the tofu is cooked, add it to a large bowl along with the quinoa, peas and other vegetables.

For the dressing, grate ginger and garlic into a bowl. Add the dark soy sauce, lime juice, rice vinegar, peanut butter water and olive oil. Mix well and add to the quinoa, tofu and vegetables. Toss the salad together, and finally add cilantro (optional).